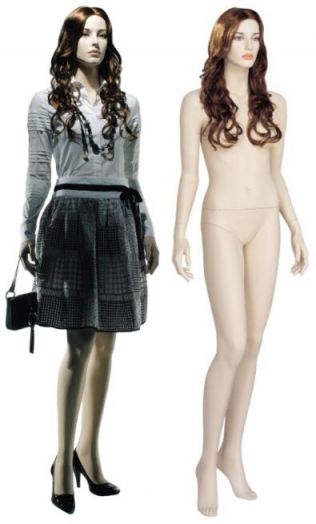
One might think that dressing a mannequin is pretty easy and pretty obvious. But as with most things that look easy, there is a technique or strategy that is involved in order for it to be “easy”.
An instructor at a who teaches visual merchandising at City College of San Francisco, writes a blog called I Do Windows. In one of her blogs she posted a question from the final exam given to students, and the question was “How do you dress a mannequin” and the students had to number from 1-8 the proper steps involved.
Here are the steps (not in sequence) let’s see how you would do.
- Turn back to upright position
- Add shoes
- Finish dressing and styling mannequin
- Pull on pants and shorts
- Add the undergarments first if needed
- All clothing should be pressed or steamed
- Separate the legs from the torso and turn upside down
- Slide arms through sleeves, one at a time, and attach to torso
Here are the answers from the instructor:
1. Make sure all clothing is steamed or pressed. Remove price tags and re-attach them with your Kimble gun to a less conspicuous place. Don’t remove them and save them in mannequin clothing book?!? My old boss used to do that, the tags always ended up lost, and sales people hate that. Always keep the price tags with the garment, attached through a seam, or the name tag at the back of the garment.
2. Detach the legs from the torso (or upper body) of the mannequin. If you’ve never worked with one before, keep in mind mannequins are a tiny bit heavy, and awkward. Twist the torso and pull it up. Once you have the legs separated, turn them upside down. You might notice on some mannequins even the legs can be separated from each other, this makes it easier for slipping on pants when you have a mannequin that does an elaborate pose.
3. Add the undergarments first, if your choice of outfit requires it, such as tights, put on socks too if needed, now pull on the pants or shorts. Sometimes you can add the shoes at this point too if they will stay securely in place.
4. Turn the legs back upright and re-attach to the torso. I also at this point will put it back on its base so it’s standing on its own, fix the pants or shorts.
[What if it’s a skirt or dress? With the mannequin standing upright on its base. I remove the arms from the torso and slide garment over the head of the mannequin, then slide the arms through the sleeves if it’s a dress, and re-attach to the torso.]
5. Detach the arms from the torso, you will notice a seam at the hands too. Pull the hands off. Carefully slide the arms through the sleeve of the shirt, then re-attach the arm to the torso. Do the same with the other side. Re-attach the hands.
6. Re-attach the torso to the legs. Can you put the shirt on with the torso already attached to the legs? Of course, just remove the arms and separate the hands.
7. Finish dressing and styling your mannequin, pay attention to detail, keep those garment tags tucked in and out of sight! View your mannequin from all angles, especially the view your customers are going see.
8. Add shoes. I don’t know why, but I always add shoes last. You don’t have to but I do; with the mannequin secured on its base I grab a coworker to slightly lift my manny while I slide on the shoes.
This was a quick and easy rundown of dressing a mannequin. I have even been known to completely lay my manny on a table and dress it that way – whatever gets the job done!
Points to remember:
- Don’t dress your mannequin on the sales floor. Take it to the studio or a back room. Don’t ask me why, but customers get offended at the sight of a naked manny!
- Make sure your manny is clean and dust free. Wipe it down if needed before dressing it.
- The limbs ARE NOT interchangeable with other mannequins.
- Don’t re-paint the face of your mannequin yourself, leave it to the professionals who specialize in this.
Feel free to share your tips!
