
How to Repair a Mannequin – Part 1 of a 2 part series
Since we sell new, used and vintage mannequins at Mannequin Madness we get lots of emails about mannequin repairs. We send our repairs to professional mannequin refurbishing companies you can find on the blog post we wrote here:
We highly recommend that use those companies if you have a mannequin that you feel is collector level or if your mannequin has extensive damage.
But for your everyday mannequin with relatively minor repairs or painting you can probably do it yourself, if you are handy.
We’ve culled the internet to find the best information on this topic. This is the first in a three part series from a vendor we found on Ebay, called lucitebox. who has written various mannequin repair guides.
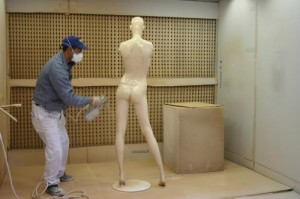
This guide they call Painting Your Lady:
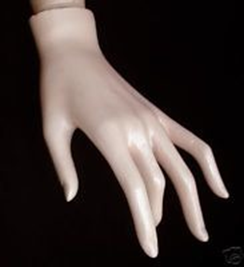
To paint your mannequin, you will need to first clean your manni’s arms with rubbing alcohol and a cotton pad.
Don’t rub too hard, just get the surface dust off and any dirt. (If you rub too hard, you’ll remove a lot of the old paint and most of the shine. You might want to test an inconspicuous area first.)
Take your clean mannequin arm in a tote bag to Home Depot (or any place that mixes custom paint colors.) It’s likely that the folks at the paint counter will think you’re weird and they might think they cannot help you, but they can.
A scan of the forearm should yield a color close to what you want. You can also try matching your arm with colors in the rack, but custom colors may work best.
I bought my paint at Home Depot. They sold me a quart of interior satin enamel. It’s Behr Premium Plus — Pastel Base no. 7500. I suspect this is the paint used to mix custom colors. It does seem to be a perfect match.
Get the finest quality 1-2″ size brush you can afford. Apply smooth coats of paint to the area. If you’re doing a larger area (like the chest), get a very small fine roller, too.
The small roller is about 2 inches long. It’s meant for edging, I believe. It’s sort of sponge-like. Moreover, if you know how to use an airbrush, this might be the time to apply your skills.
If you don’t have one or don’t know how to use one, then just use the brush and roller method. Another suggestion, though I haven’t tried it, would be to mix your paint with some Matte Medium which is what fine artists sometimes use to work with acrylic paint.
This will allow you to thin the paint but not dilute the color. Matte Medium will allow you to apply many layers of paint–slowly, but evenly.
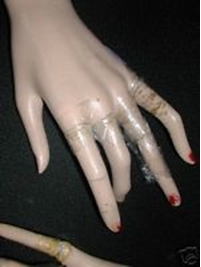
If you’re doing something more detailed like hands, you might want to place them on a piece of white waxed freezer paper that’s taped to your table. (Note–do not use the brown butcher paper. Get white freezer paper with wax on one side.)
Or, you could paint the hands while they’re on the arms attached to the manni. If you’ve got a good paint color match, you shouldn’t have to paint the whole arm–just the hands.
Use as little paint as possible rather than applying a lot of paint. A few coats rather than one thick coat looks best.
When I did this paint job, my brush was too old, dry and thick.
I would have used a better brush had I known I’d end up with some streaky strokes.
(You can’t really see them in the photos, but in real life they’re there.)
Please be sure that you’re always painting a clean area. If you’ve got cracks or chips in the area, you should sand them.
If there are major breaks, you will need to fix them. This step-by-step Bondo method works well.
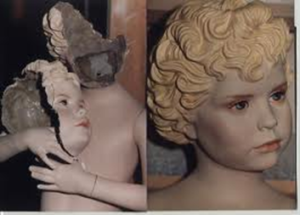
Below you can see another area of my mannequin that was damaged. The coat of original paint on the manni was very thick so it had to be sanded smooth before painting.
Here’s a before and after:
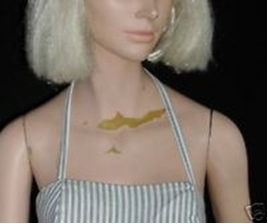
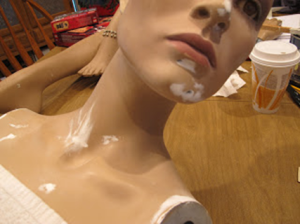
When painting the chest, I simply rolled over the area that was sanded and then blended areas with one of those flat sponge “brushes” so I didn’t have to do the whole torso.
You can, of course, do the whole torso, but try to use as little paint as possible, always layering rather than heavily coating any surface.
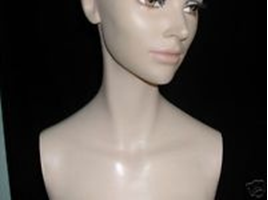
If you want, now that you have your perfectly matched color, you can touch up any problem areas using very, very thin coats and a small sponge applicator. I dabbed some paint on the chip that’s on her nose, but ideally, that area should be sanded and repainted, too.
A frequently used mannequin that’s shop worn and ravaged by time can sometimes be a turn-off in auctions.
A damaged mannequin does little to enhance your garments and can actually detract from the clothing. Editing and re-touching photos in a photo editing program takes time.
In the long run, it may be better to repair and repaint your mannequin. Your auctions will look that much better once you restore the youthful glow to your vintage manni.