
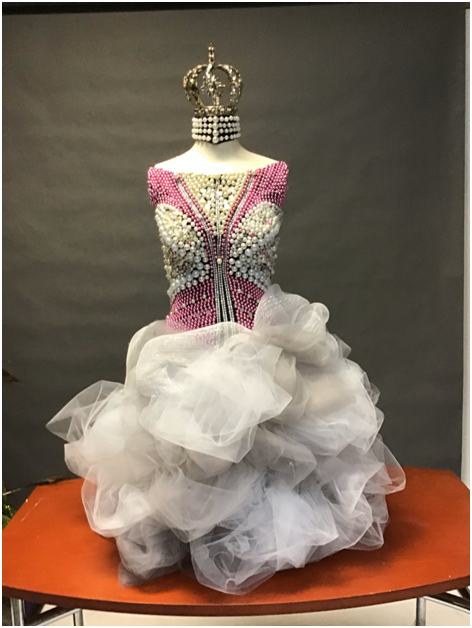
A beautiful pearl-encrusted mannequin torso like the one above is super easy to create. The only skill needed is patience because it is a little time consuming. But the result is so worth it!
It is a very creative way to repurpose pearls from broken pieces of jewelry (along with any other beads, buttons or shiny objects). You could also use strings of Mardi Gras Beads to remind you of the good time you had celebrating it..
Our initial inspiration was this pearl covered mannequin torso that we saw on Pinterest.
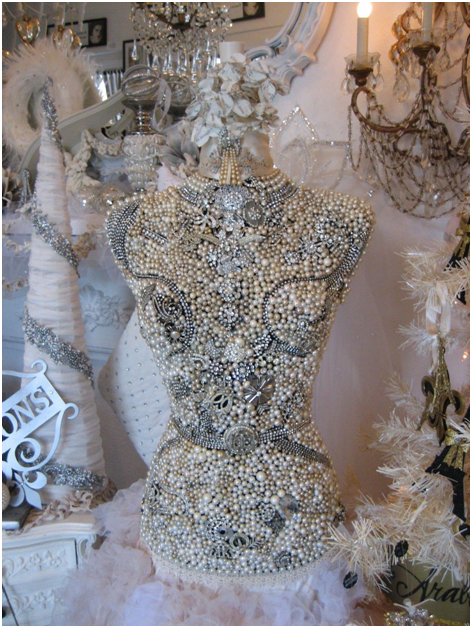
When we posted it on Facebook it got TONS of likes so we knew that this struck a nerve with crafters. But that one is so intricate it is not very easy for a beginning crafter. And it requires a lot more materials than most people have on hand.
So we came up with our “hack” version which takes less time, less materials and can be do in a relatively short period of time. We like to offer projects at Mannequin Madness which can be made by people of all crafting levels.
Here are the supplies and steps needed.
SUPPLIES
- A female mannequin torso. The torso can bemade of cloth, fiberglass or plastic. But we recommend a torso that is three dimensional, not the torsos the are just a shell with a hollow back, l like this style. (NOTE you can save money and buy a USED versus NEW torso. We have a selection here.
- A small t shirt that is stretchy because it is made out of jersey, not cotton. Otherwise the shirt will not fit tight on the torso which is what you MUST have. You can also use a swimsuit, corset, tube top or bra. The reason for using a t-shirt or other fabric is it makes it much easier for the glue to adhere to the form. And if by chance you don’t like your finished product, you can remove the garment and start over.
- A HIGH-heat glue gun (Be sure it’s high-heat, a low heat glue gun dries too fast) and plenty of glue sticks
- Painter’s or masking tape to mark off the beading areas for your design.
- Pearls, beads, buttons, jewelry, etc.– If you don’t have enough broken or discarded pieces of your own jewelry you can supplement by buying jewelry at a thrift store. Or buy a string of beads at a craft store. And as we said earlier you can repurpose Mardi Gras beads. The larger the beads, the less glueing you have to do!
- We also used rhinestone covered ribbon called “faux jewel diamond wrap” which looks like this:
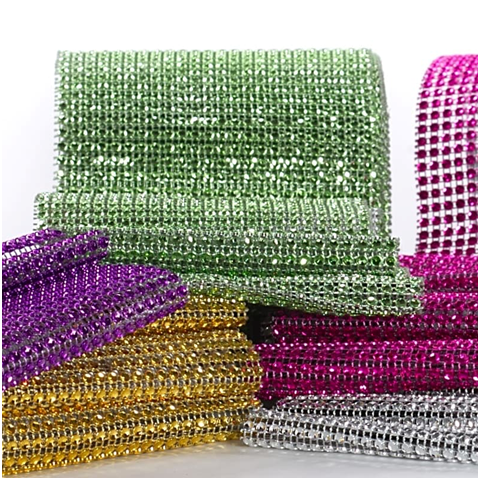
Papermart, a company that sells unique crafting supplies offers a 10% discount to our customers if you use this code: MMDress10. They sell the rhinestone ribbon, pearls on a roll, rhinestone chains and other materials that are perfect for this project.
STEPS
- Pull the stretchy t-shirt (or other garment) over the torso and make sure it is a tight fit. You can use pins, iron-on tape or hand sew it to ensure it is a tight fit. If the shirt has sleeves, cut them off at the armpit and reserve them for making a choker which we will describe below.
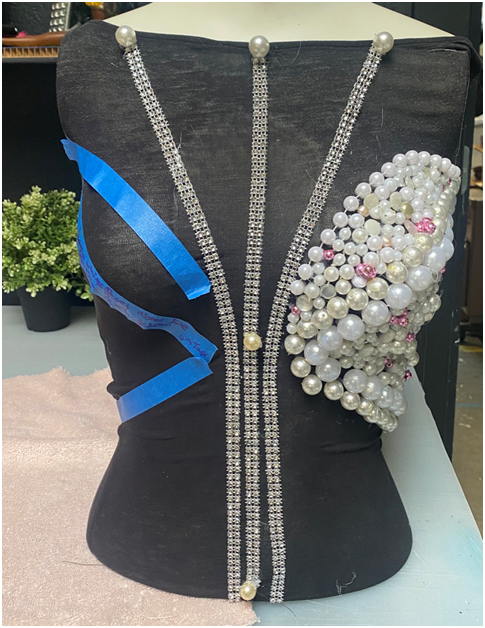
2 Take the painter’s tape and mark of the areas that you want to bead. The painter’s tape will hep you maintain a symmetrical look if that is desired. Using the glue gun begin beading one marked-off area with loose or strung beads. You’ll get different effects for each. Add buttons and other adornments to get the look you want.
3. Move onto another marked off area until the torso is as covered as you wish. It might be easier to put the torso on its back as you work.
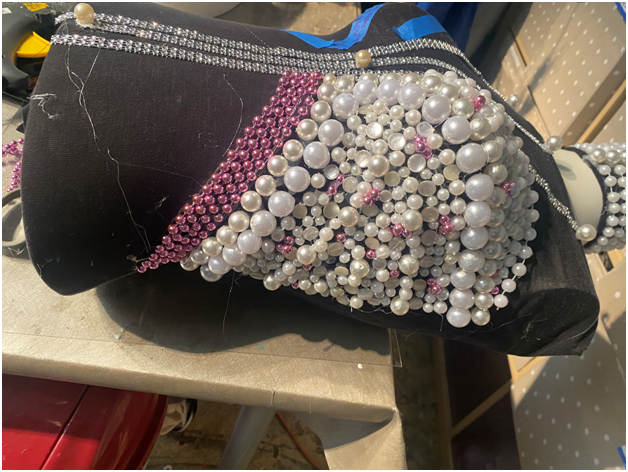
4 You might find that you will change your mind about your design as you work. When we first started the plan was to use only pearls and rhinestone covered ribbon. But since we didn’t have enough pearls, we used our leftover pink beads from Mardi Gras.

And we also were going to leave some of the black t- shirt showing as you seen in the photo above. But we changed our mind as well which you will see in the final result.

5 You can create a choker necklace with the leftover material of sleeves from the t-shirt. Just put the fabric over the neck of the torso and make it fit snug and then embellish.
6 When the front is as complete as you want it to be, cover the arm holes on each side with a beads.Beading the back of the form is optional. Since ours was going to be displayed against a wall, we didn’t bead it.

As a finishing touch we glued a crown to the neck cap. You could also glue more beads, silk flowers or a drapery finial. Click this link on Amazon for our list of vendors that sell crowns. You could also attach angel wings like the ones from these Amazon vendors.
We put the torso on a table top height stand and made a skirt for it out of tulle and deco mesh. A petticoat would achieve a similar effect. The torso was just too pretty to have a bare metal stand protruding underneath.

For a more dramatic effect for the skirt, using deco mesh look at this one we did for a Mardi Gras themed beaded torso below.
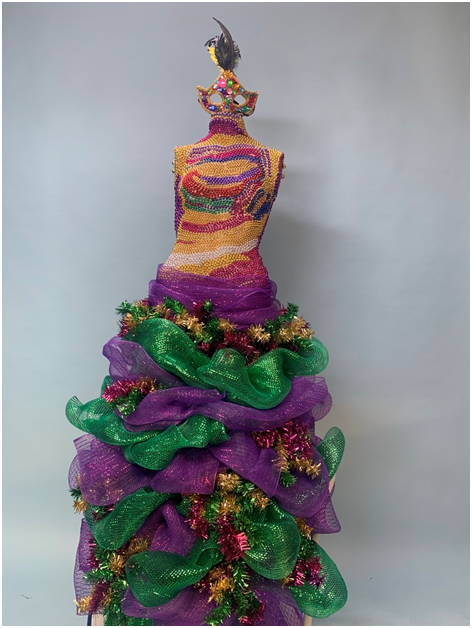
We put the torso on a tall stand and made a skirt using chicken wire (you can also use a tomato cage) and decorated it with deco mesh and Mardi Gras garland. You can also do this idea for Xmas and use deco mesh and pine garland and attach your holiday ornaments.
If you need instructions on how to make this type of skirt we have a digital tutorial and we teach monthly classes on Zoom. For more examples of bead, pearl and button art projects on a mannequin torso see this Pinterest board.
And join our Facebook group to see other ideas for repurposing a mannequin and share what you have made.