
Chicago based visual merchandiser JD Vincent wrote this very detailed blog about how to strike a mannequin and we are reprinting it here.
In a lyric riff from Madonna’s “Vogue” – “Strike a pose. There’s nothing to it.” Actually there is something to it – but it’s an easily learned skill. I’m going to attempt to have a discussion on the merits of “Striking” a mannequin as opposed to using the pole and base that it comes with. Then – I’ll attempt to describe how to do it, which is not the same, obviously, as showing you in person how to do it.
To many of you this may seem to be silly – everyone strikes mannequins, right? So, if this bores you, see you later on a different topic.
When I first started in Visual Merchandising – or as it was still being called then – the Display Department – virtually every major department or specialty store “struck ” their mannequins in their display windows with few exceptions. It creates a cleaner look – none of those clunky and awkward metal poles and glass bases to contend with. It gives you more agility in mannequin placement. You’re able to place the mannequins in closer proximity to and interact more with the props.

Striking mannequins is one of those display practices that was handed down from generation to generation – like how to cut foam board or simply the correct way to dress a mannequin. There are only a few stores left that still do this – let alone have a staff to do it – but who are still around period. They’re usually in major cities – New York, Chicago, San Francisco etc. – Macy’s, Nieman Marcus, Bergdorf Goodman, Saks Fifth Ave., to name a few.
I will be explaining the process using a standard mannequin construction that are mostly used for this process of striking a mannequin – a Rootstein for example . There are many other companies that also manufactured their mannequins in a similar way but the Adel Rootstein mannequin is known world wide.
The Rootstein mannequin came equipped as a package with a square shaped metal rod that fit into a glass base. The rod came up from the base and fit into a hole in the mannequin’s – for a lack of a better term – butt. At both ends of the pole there was a screw to tighten each point of entry.
Items you will need: 20 gauge wire, 2 inch “penny” nails with heads, a nice basic carpenter’s hammer – preferably with a rubber grip – and a good quality wire cutter – avoid the big ones – get a smaller size that will fit handily into your back pocket as you work. Years ago we called these wire cutters “snips”.
Your display window should also have a fairly thick wood floor with or without carpet. If you have a thick carpet – consider a longer nail.
To “strike” the mannequin you eliminate both the pole and the glass base. You then buy 20 gauge wire (not electrical!) – preferably a black wire that’s not been coated with some sort of film – consult your local hardware store – try to not buy the shiny silver wire as it’s hard to manipulate with your hands.
Then – before you dress the mannequin – measure out the wire – giving yourself a little bit more than you will need – you will need a combined two lengths of the wire to reach the floor of the window. One length each to be in front and in back of the mannequin + enough to secure the wire in the mannequin’s butt and to wrap around two nails.
Using a middle point of the wire – pinch it together to make a sharp “V” shape, insert that “V” shape wire into the hole left by taking the metal pole out then out through the hole that the screw was in. Finish off by taking that “V” end and and wrap and secure the wire several times around itself close to the opening that the rod was in. Then – dress your mannequin – complete with shoes. Lean her or him against the wall while you place your props where you want them.
For the striking process itself you will need two people – one to hold the mannequin in a firm standing position and the other person to be on his/hers hands and knees – this is the person actually doing the “striking”.
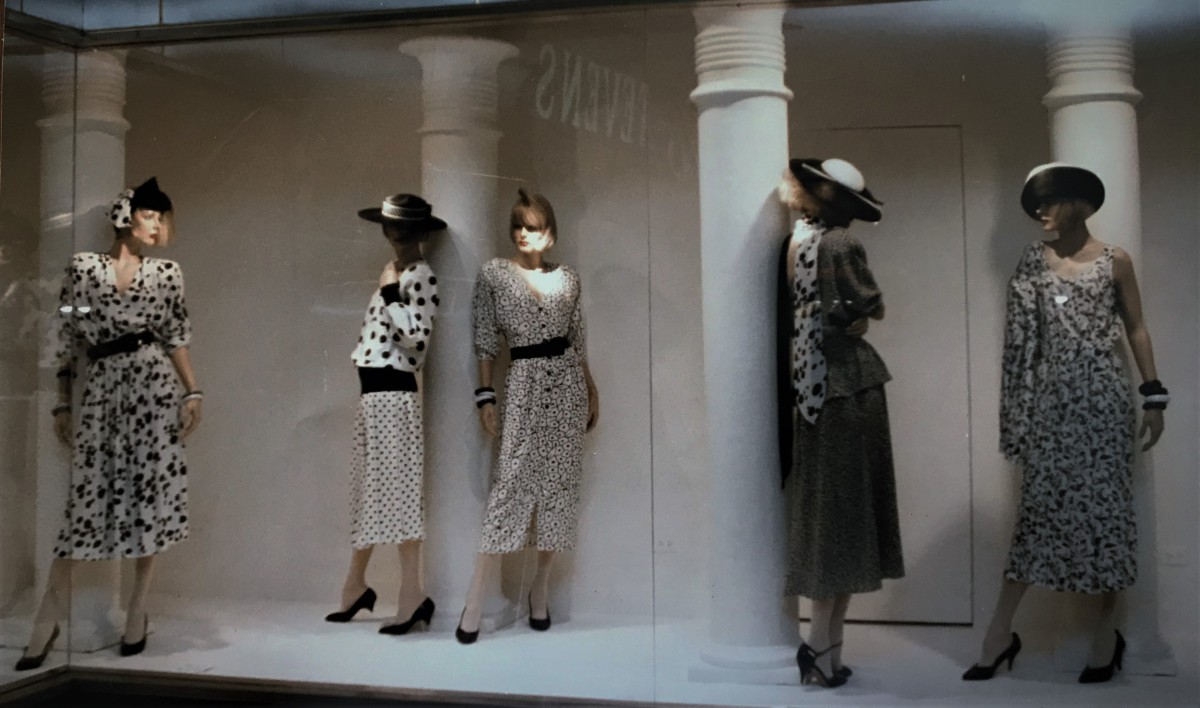
While the person standing is holding the mannequin firmly and straight up (it’s best for the person holding the mannequin to stand in front of the mannequin and hold her by the neck) the “striker” nails in one of the nails in back of the mannequin – about 12″ away from the mannequin’s legs – nailing in the nail – halfway only – at a roughly 45 degree angle towards the mannequin. This is where nail placement can get tricky. If a mannequin’s pose is leaning one way or the other – such as the first girl on the left and the girl in the center are thrusting their left hips out (in the first picture) – put that nail to the opposite direction a bit – in this case right of center.
After your back nail is firmly nailed into the floor only halfway – and your person holding the mannequin is firmly holding the mannequin – hold her by the neck with a downward thrust – take one of the wires and pull it with your hands around the nail head several times – then hammer the nail firmly the rest of the way into the floor. That wire needs to be taut! You should be able to pluck it like a base fiddle and hear a ping! The person holding the mannequin should never let the mannequin go back as the striker is pulling the wire.
The person holding the mannequin now must gently pull the mannequin towards the front so as not to have the back wire have any slack to it. Then the striker repeats with the front wire – both wires need to be taut! Pluck it and hear it ping again! Finish up with cutting off the excess wire.
There are several cases where you will have a few variations on this system depending what pose your mannequin is in and what kind of shoes – if any – she/he is wearing.
You will find as you do this process more and more that it is not an exact process – you will have times that – depending upon the individual mannequin’s pose – you will have to improvise a solution to get that particular mannequin to stand properly. In no particular order – and these are just a few – these scenarios might occur:
- You have a mannequin that is posed with legs/feet very close together. You might need three wires.
- You have a pair of trousers on a mannequin – you will then have to decide if you want to very carefully open up the seam with a seam ripper and have your alteration department sew it back up – or you will have to sew it yourself.
- You have two mannequins that you want to be posed very close together – you may have to position them together at the same time and plan where your wires are going first before you strike the first one – you don’t want to have wires awkwardly overlapping each other.
The different scenarios that might come up with striking mannequins are endless. But I do think that once you get the basics down and can see what a difference it makes in your window display design – you will not only find a solution – the end results will be worth your extra efforts.
- All Photos Courtesy Of – https://jdvincentdesign.com/
Source : https://visualmerchandisingdisplays.wordpress.com/2020/05/28/strike-a-mannequin-theres-nothing-to-it/